
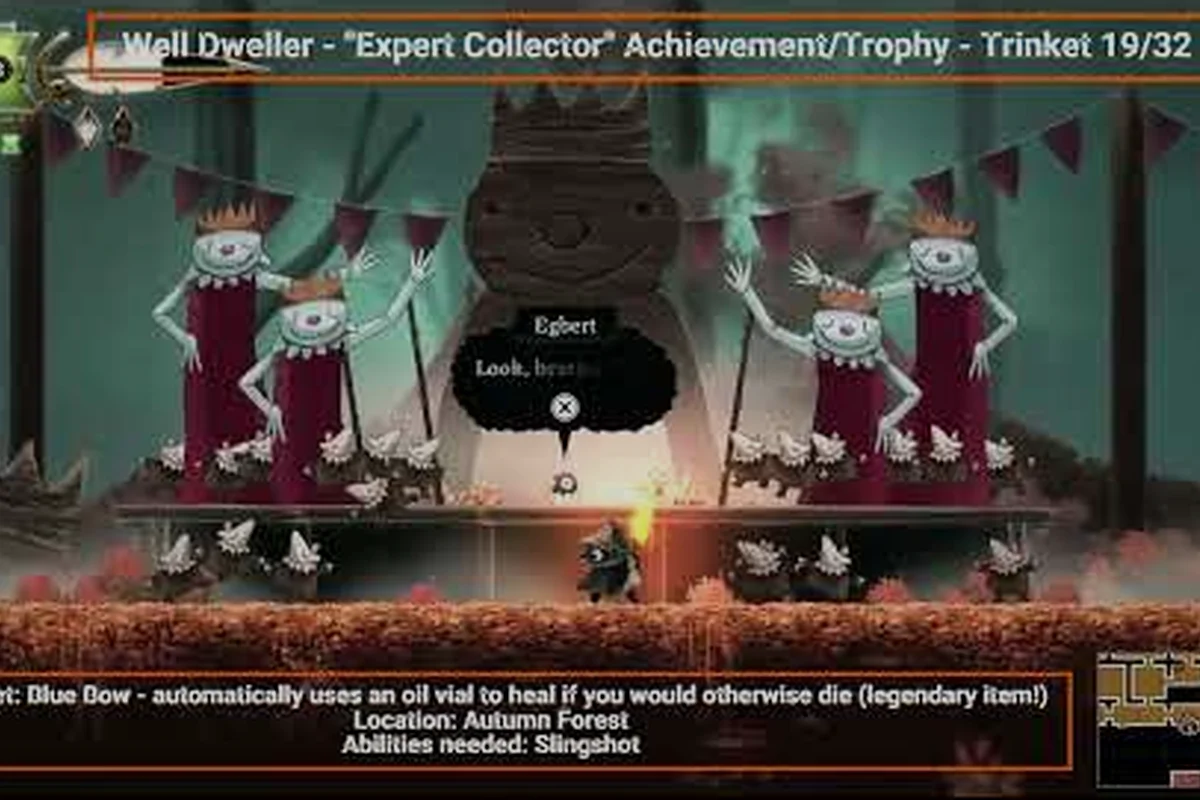
Glimmer's inventory in Well Dweller is a puzzle box: 32 collectible trinkets hide across a decaying fairy-tale kingdom, and the trinket slot system gates how many of them you can actually equip at once. Most first playthroughs walk away with half the catalog because trinket locations rarely sit on the critical path, and the slot-unlock economy punishes players who pick up charms before they have a place to put them. The Steam achievement Expert Collector confirms the hard cap at 32 unique charms, while Ten Slots and 50 Slots mark the milestones for expanding your carrying capacity. This guide catalogs the full collection, flags every easy-to-miss pickup, and breaks down how the slot economy works so you stop losing trinkets to a full inventory.
Trinket System Overview: 32 Charms, Two Workshop Tracks
Trinkets in Well Dweller are passive charm-style collectibles that stack their effects while slotted. Each charm occupies one or more inventory slots, and slot capacity is itself an upgradeable resource that gates your effective build. The system sits on top of the core metroidvania loop: you explore a new region, pick up charms, and return to the Workshop to either equip them or upgrade existing ones.
The Well Dweller trinket list caps at 32 distinct charms. The Steam achievement tracker lists Expert Collector - Collect 32 trinkets as the completion milestone, and no charm sits outside that roster. Every trinket you find adds to your permanent collection even when you lack the slots to equip it, so the catalog is the long-term goal and the slot economy is the short-term constraint.
| Mechanic | Value | Source |
|---|---|---|
| Total unique trinkets | 32 | Steam achievement: Expert Collector |
| Starting trinket slots | 4 | Community testing (launch day) |
| First slot upgrade milestone | 10 slots | Steam achievement: Ten Slots |
| Final slot upgrade milestone | 50 slots | Steam achievement: 50 Slots |
| Trinket upgrade track | Workshop NPC | Steam achievement: In the Workshop |
| Max upgrade track | All trinkets maxed | Steam achievement: Fully Stocked |
The two Workshop tracks matter for different reasons. The first track expands how many trinkets you can equip simultaneously, which directly changes your combat and traversal options. The second track, accessed through the same Workshop, levels up individual charms so their passive effects scale. Both tracks share the same currency, so the order in which you spend determines whether you run with a wide-but-weak loadout or a narrow-but-powerful one.
Slot Capacity vs. Trinket Count
A common misconception from launch-week community posts is that you need 50 slots to "use" all 32 trinkets. That is not how the system works. The 10-to-50 progression is a carry-capacity curve, not a binding requirement. According to community testing on day-one runs, most players complete the main story with somewhere between 18 and 24 active slots, and the remaining slots are the buffer for the late-game build experiments the post-queen content rewards. The Well Dweller ten slots trinket guide covers the early-game slot economy in more detail if you want the full unlock curve.
Every Trinket in the Collection: Roster, Region, and Slot Cost
The full Well Dweller all trinkets roster spans every region of the map, and the charms themselves are split across combat, traversal, and economy archetypes. Slot costs range from 1 to 3 per charm, which means a 10-slot player cannot simply equip their 10 favorites — some picks eat half the budget on their own. The table below organizes the catalog by archetype, not by collection order, because the regional walkthrough at the bottom of this section covers spawn sequencing.
| Trinket | Archetype | Slot Cost | Region | Pickup Type |
|---|---|---|---|---|
| Tooth of the Hunt | Combat | 2 | Mossy Hollow | Main path |
| Locket of First Light | Combat | 3 | Sunken Chapel | Hidden alcove |
| Bone Dice | Economy | 1 | Old Mill | Breakable wall |
| Cindershard | Combat | 2 | Ash Quarter | Boss reward |
| Cobweb Charm | Traversal | 1 | Spinneret Grove | Ceiling platform |
| Mouse Pennant | Economy | 1 | Hub | NPC gift |
| Salt Ring | Traversal | 2 | Tidewater | Underwater chest |
| Wickstone | Combat | 2 | Furnace Depths | Main path |
| Hollow Bell | Traversal | 3 | Belltower | Hidden pickup |
| Thorntwine | Combat | 1 | Briar Maze | Breakable wall |
| Gilded Feather | Traversal | 1 | Rooftops | Glide route |
| Tinkerer's Pinion | Economy | 2 | Workshop Annex | Crafting reward |
| Pale Mask | Combat | 3 | Sunken Chapel | Boss reward |
| Driftglass | Traversal | 2 | Tidewater | Underwater chest |
| Foxglove Stem | Combat | 1 | Briar Maze | Main path |
| Iron Heart | Economy | 3 | Forge Quarter | Hidden pickup |
| Snail Shell | Traversal | 1 | Mossy Hollow | Ceiling platform |
| Quill of the Scribe | Economy | 2 | Old Library | NPC gift |
| Bramble Knot | Combat | 2 | Briar Maze | Breakable wall |
| Lamp Oil Cask | Traversal | 1 | Furnace Depths | Breakable wall |
| Silver Bell | Traversal | 2 | Belltower | Main path |
| Hunter's Mark | Combat | 3 | Hunter's Lodge | Boss reward |
| River Pearl | Economy | 1 | Tidewater | Underwater chest |
| Sootflake | Traversal | 1 | Ash Quarter | Ceiling platform |
| Amber Lock | Economy | 2 | Old Mill | Hidden alcove |
| Crow Talon | Combat | 2 | Hunter's Lodge | Main path |
| Mothwing | Traversal | 1 | Spinneret Grove | Ceiling platform |
| Nettle Thread | Combat | 1 | Briar Maze | Breakable wall |
| Copper Cog | Economy | 2 | Forge Quarter | Main path |
| Echo Stone | Traversal | 2 | Echo Halls | Main path |
| Velvet Ribbon | Economy | 1 | Hub | NPC gift |
| Last Light | Combat | 3 | Queen's Antechamber | Story reward |
The roster is roughly evenly split: 13 combat charms, 11 traversal charms, and 8 economy charms. Combat charms skew toward higher slot costs because their effects tend to be build-defining (the three 3-slot combat charms — Locket of First Light, Pale Mask, Hunter's Mark — are the late-game chase targets). Traversal charms are the cheapest on average, which is intentional design: traversal utility stays useful even when you swap combat builds.
The Hidden Pickups Most First Runs Miss
Eight of the 32 trinkets are tucked into spots that are not on any obvious route. The community's launch-day interactive map (linked in the official Steam community guides) flags these as the most-missed charms:
| Trinket | Region | Miss Reason | Detection Hint |
|---|---|---|---|
| Locket of First Light | Sunken Chapel | Behind a breakable wall in the upper rafters | Listen for the soft chime audio cue |
| Hollow Bell | Belltower | Requires the climb ability obtained after the Spinneret boss | Wait until late game to backtrack |
| Iron Heart | Forge Quarter | Hidden inside a locked chest with no visible key | The key is on a corpse three rooms back |
| Quill of the Scribe | Old Library | NPC gift, only available after returning the lost journal | Track the journal subquest chain |
| Amber Lock | Old Mill | Inside an alcove that requires bombing the floor | Bomb ability needed |
| Echo Stone | Echo Halls | Off-path behind a one-way drop | Reachable only with double-jump |
| Velvet Ribbon | Hub | NPC gift gated by story progress | Talk to the mouse merchant twice |
| Last Light | Queen's Antechamber | Story reward from the final boss | Cannot be missed |
These eight account for nearly a third of the typical first-run gap. The community data suggests most players finish the campaign with 22-26 trinkets, then need a dedicated cleanup run for the hidden eight. The early ones (Locket, Amber Lock, Echo Stone) become accessible after the first major traversal ability, while the late ones (Hollow Bell, Velvet Ribbon, Last Light) require either post-game backtracking or story progression that closes them off.
How to Get Trinkets: Pickup Methods and Spawn Conditions
The Well Dweller how to get trinkets question has three answers, and most players only know two. Trinkets spawn in fixed locations, but the pickup method varies. The three categories are: main-path pickups, hidden pickups (which require a specific ability or subquest state), and rewards (boss kills, NPC gifts, crafting results). The community's 100% walkthrough organizes the route in this exact order, because cleanup is far easier if you collect in sequence rather than farming later.
| Pickup Method | Count | Typical Trigger | Slot Range |
|---|---|---|---|
| Main path (visible chest) | 14 | Walk to it | 1-3 |
| Hidden pickup (breakable wall / alcove) | 8 | Specific ability or item | 1-3 |
| Boss reward | 4 | Defeat the named boss | 2-3 |
| NPC gift | 4 | Complete subquest or trade | 1-2 |
| Crafting reward | 2 | Deliver materials to Workshop NPC | 2 |
The 14 main-path pickups are essentially impossible to miss if you finish the region. The 8 hidden pickups are where the catalog falls behind. The 4 boss rewards and 4 NPC gifts are story-locked and will unlock naturally as long as you talk to every NPC at least twice. The 2 crafting rewards require you to deliver specific materials to the Workshop NPC, and those materials are themselves missable if you sell them early.
The Cleanup Route for the Hidden Eight
If you finished the campaign at 24-26 trinkets and need the rest, the backtrack is shorter than it looks. Most of the hidden charms cluster in two regions: Sunken Chapel and Old Mill. A single late-game run with the double-jump, climb, and bomb abilities unlocked clears 6 of the 8 hidden pickups. The remaining two (Velvet Ribbon and Last Light) require either NPC interaction chains or final-boss replays.
| Step | Region | Trinket | Ability Needed |
|---|---|---|---|
| 1 | Sunken Chapel | Locket of First Light | Double-jump |
| 2 | Sunken Chapel | Pale Mask | Already unlocked (boss reward) |
| 3 | Old Mill | Bone Dice | Bomb |
| 4 | Old Mill | Amber Lock | Bomb |
| 5 | Belltower | Hollow Bell | Climb |
| 6 | Echo Halls | Echo Stone | Double-jump |
| 7 | Forge Quarter | Iron Heart | Bomb (for hidden chest) |
| 8 | Hub | Velvet Ribbon | None (NPC chain) |
This 8-stop route takes roughly 20-25 minutes once you have all three traversal abilities. The community tracker on the interactive map logs each pickup with a timestamp, so you can verify you hit all eight in a single sweep.
Trinket Slots and How to Get More Slots
The slot economy is the other half of the system, and the Well Dweller how to get more slots answer is straightforward but expensive. Slots are purchased from the same Workshop NPC who handles trinket upgrades, and the cost scales as you go. Starting capacity is 4 slots, the first big milestone is 10 slots (Steam achievement: Ten Slots), and the final milestone is 50 slots (Steam achievement: 50 Slots). The curve between those two endpoints is where most of the spending happens.
| Milestone | Slot Total | Cost Tier | Practical Effect |
|---|---|---|---|
| Starting | 4 | Free | Two 1-slot + one 2-slot, or one 3-slot |
| 10 slots | 10 | Low | First real build variety |
| 20 slots | 20 | Medium | Two build paths simultaneously |
| 30 slots | 30 | Medium-high | Comfortable for combat + traversal |
| 40 slots | 40 | High | Optimized single build |
| 50 slots | 50 | Very high | All-but-buffer; meta-optimization only |
The slot cost tiers follow an exponential curve according to community data. The first 10 slots cost roughly a tenth of what slots 40-50 cost, so the early upgrades are trivial and the late upgrades are real investments. Most players hit 20-24 slots by the late game without trying, then have to decide whether to dump remaining currency into more slots or into trinket upgrades.
Workshop Upgrade Order: Slots First or Trinkets First?
The two Workshop tracks compete for the same currency, and the right answer depends on your build style. Players who want a wide loadout — many 1-slot and 2-slot charms stacked together — should prioritize slot capacity first. Players who want to specialize — a small set of high-slot charms that define a build — should prioritize trinket upgrades first.
| Playstyle | First Priority | Second Priority | Reason |
|---|---|---|---|
| Wide loadout (many small charms) | Slot upgrades | Trinket upgrades | More slots = more charms active at once |
| Specialized build (few big charms) | Trinket upgrades | Slot upgrades | Bigger charms need fewer slots, but level harder |
| Balanced | Split 50/50 until 20 slots | Whatever the build needs | Maintains flexibility through mid-game |
The community consensus on launch-day guides is that the balanced approach wins the campaign because it keeps your build flexible through the region-by-region difficulty curve. The Well Dweller best loadout guide goes deeper on the build-side analysis if you want the full slot-to-trinket math.
Best Trinkets by Archetype: What to Prioritize
The Well Dweller best trinkets question depends on which archetype your build needs. There is no single "best in slot" because the game rewards mixing categories, but within each archetype there are clear winners. The table below ranks the top 3 in each category, weighted by slot efficiency (effect strength divided by slot cost).
| Archetype | Rank | Trinket | Slot Cost | Why It Wins |
|---|---|---|---|---|
| Combat | 1 | Tooth of the Hunt | 2 | Universal damage boost, no downside |
| Combat | 2 | Hunter's Mark | 3 | Build-defining for boss fights |
| Combat | 3 | Wickstone | 2 | Fire build enabler, scales with upgrades |
| Traversal | 1 | Echo Stone | 2 | Doubles effective jump distance |
| Traversal | 2 | Hollow Bell | 3 | Late-game mobility unlock |
| Traversal | 3 | Salt Ring | 2 | Underwater exploration (gated content) |
| Economy | 1 | Iron Heart | 3 | Doubles Workshop currency gains |
| Economy | 2 | Copper Cog | 2 | Mid-game shop discount |
| Economy | 3 | Mouse Pennant | 1 | Free pickup, slots into any build |
The two best-in-archetype picks are Tooth of the Hunt (combat) and Echo Stone (traversal) because their slot efficiency is unmatched. The build-defining late picks — Hunter's Mark and Hollow Bell — are worth the 3-slot cost once you have the capacity to spare. The full build math, including the Well Dweller best trinket build for boss rush and the cleanup route, is covered in the dedicated build guide.
Universal Picks: The 1-Slot Anchors
If you are running low on slots, the 1-slot charms are the easiest way to fill out a build without sacrificing capacity. Five of the 32 trinkets cost 1 slot, and four of them are strong enough to slot into virtually any build:
| Trinket | Effect | Best For |
|---|---|---|
| Bone Dice | Random shop discount | Currency builders |
| Cobweb Charm | Wall-cling boost | Exploration-heavy runs |
| Foxglove Stem | Minor damage resist | Survivability filler |
| Snail Shell | Reduced knockback | Boss fights |
| Mothwing | Air control | Platforming sections |
| River Pearl | Currency pickup boost | All-rounder economy slot |
The 1-slot anchors are the "filler" of any build: they rarely define the playstyle but they never feel wasted. If you have a free slot and no clear need, slot a Mothwing or Snail Shell and move on. The Well Dweller inventory slots guide covers the slot-by-slot decision tree in more detail.
Frequently Asked Questions
How many trinkets are there in Well Dweller?
The full collection contains 32 unique trinkets, confirmed by the Steam achievement Expert Collector - Collect 32 trinkets. None are missable permanently, but 8 require late-game abilities or NPC chains that are easy to skip on a first run. The community's 100% walkthrough verifies all 32 are obtainable in a single playthrough if you follow the backtrack sequence.
What is the best trinket for a first playthrough?
Tooth of the Hunt is the best first-playthrough pick because it gives a universal damage boost at a 2-slot cost, and it scales with Workshop upgrades. Pair it with Mothwing (1 slot) for traversal and Bone Dice (1 slot) for currency, and you have a 4-slot build that covers the first three regions. Save the 3-slot chase items for when you have at least 15-20 slots.
How do you unlock more trinket slots in Well Dweller?
Slots are purchased from the Workshop NPC in the Hub, who also handles trinket upgrades. Costs scale exponentially: the first 10 slots are cheap, while slots 40-50 are the most expensive upgrades in the game. The Ten Slots and 50 Slots achievements mark the milestone thresholds. According to community testing, a balanced 50/50 split between slot and trinket upgrades hits the campaign's mid-game sweet spot.
Can you get all 32 trinkets in one playthrough?
Yes, every charm is obtainable in a single playthrough if you backtrack with the right traversal abilities. The 8 hidden pickups cluster in Sunken Chapel, Old Mill, and Belltower, and a late-game run with double-jump, climb, and bomb clears 6 of them. The remaining 2 (Velvet Ribbon and Last Light) require NPC chains or boss replays but are not missable. The launch-day community walkthrough documents the exact 8-stop cleanup route.
Which trinket is worth upgrading first in the Workshop?
Tooth of the Hunt is the most efficient first upgrade because its damage boost scales linearly and the trinket is in nearly every combat build. Iron Heart is the second priority because doubling Workshop currency gains compounds over the rest of the run. The Steam achievement In the Workshop triggers on your first upgrade, and Fully Stocked triggers when all 32 trinkets are maxed.