
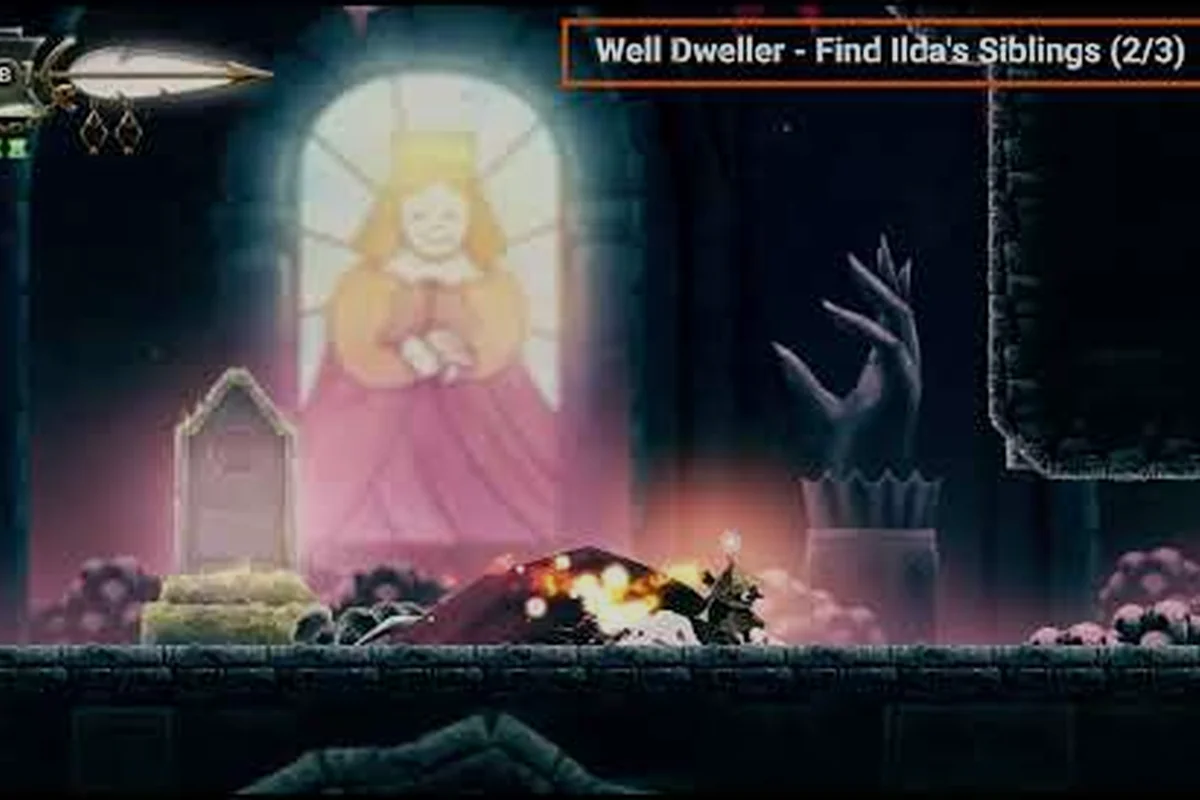
Ilda the mouse is the closest thing Glimmer has to a best friend in a kingdom that mostly wants her dead, and her camp is the soft place every player returns to between boss runs. If you have been playing Well Dweller and wondering why a tiny rodent with a backpack keeps showing up in your screenshots, this guide walks through exactly who Ilda is, where her camp sits on the map, and how her merchant friend Looter turns the area into a hub the rest of the run orbits around. The camp is also the gateway to Well Dweller Ilda's warmest moments, including the A Warm Fire achievement for camping together and the stitched-up flag that matters if you want the better endings later on.
Who Ilda Is and Why She Travels With Glimmer
Ilda is a small mouse merchant-adjacent companion who follows Glimmer through the rotting kingdom, sets up camp wherever the player stops for a healing soak, and provides the narrative warmth that the rest of the game keeps threatening to burn down. She is one of the two named NPCs that the official Steam page calls out by name, alongside Looter the scavenger, and her role is less about combat and more about giving Glimmer somewhere to rest, someone to banter with, and a reason to keep returning to the same patch of dirt after every boss.
What Ilda Does Across the Plot
Ilda is a supporting companion who never joins combat but constantly reacts to it. Community walkthroughs note that she sets up camp near Glimmer's first rest point in the Dark Garden, then relocates after each major story beat, so the camp effectively becomes a moving hub that tracks Glimmer's progress. She carries a heavy backpack, sleeps curled up by the fire, and worries out loud about her missing siblings, which is what makes her one of the most quoted characters in early-access discussion threads.
Her dialogue is the only consistent human (well, mouse) voice in a kingdom full of grotesque beasts, broken royalty, and a Hunter who steals children for a hobby, which is why players latch onto her so quickly. When the game wants you to feel a moment of peace, the camera finds Ilda, and when it wants you to feel dread, the camera finds a sibling who is not Ilda.
What Camping with Ilda Grants
The camp functions as a save point, a healing soak station, and the only reliable place in the kingdom to trigger story beats that are not tied to a boss arena. The "A Warm Fire" achievement, which is awarded for camping with Ilda according to the Steam achievement tracker, only triggers when Glimmer lights the matchstick and sits at her fire, so the camp is not just decoration. It is the line item that drives several side objectives in the first half of any playthrough.
The camp also functions as a soft reset for exploration: because Ilda reappears after almost every boss, returning to the camp is how the game teaches the player to backtrack. The matchstick economy, the trinket drops, and the small item pickups that fall from common enemies all flow toward the same camp loop, and that loop is the spine of the early game. If you want a deeper look at the entire cast, the characters hub at /en/characters/well-dweller-who-is-glimmer/ sketches out how Ilda fits next to Glimmer, Looter, and the Hunter.
Finding Ilda's Camp on the Map
Ilda's camp is not a single fixed location; it is a moving campsite that relocates after each major boss, which is one of the first things that confuses new players. The first camp sits in the Dark Garden, the second appears after the Groundskeeper, and later camps open up as Glimmer unlocks the deep regions of the kingdom.
Dark Garden Camp (First Stop)
| Region | Camp Location | Fastest Access | Heals? |
|---|---|---|---|
| Dark Garden | Just past the first bonfire, left of the Groundskeeper's path | Walk west from the starting area, drop down the ledge | Yes, full heal |
| Webdrench Inn | Behind the Inn's main hall, on the broken balcony | After the Inn's mini-boss, drop through the back window | Yes, full heal |
| Drains | On a stone shelf above the Lady of the Drains arena | Climb up after the boss dies, light the matchstick | Yes, full heal |
| Gravedigger Ground | Across the wooden bridge from the entrance | Cross the bridge, ignore the left fork | Yes, full heal |
| Lookout Tower | At the very top of the Tower climb | Use grappling to reach the peak platform | Yes, full heal |
The Dark Garden camp is the only one most players will find in a blind run, because it is the only camp the game puts in your path before the first major gate. The bonfire is interactable, Ilda is asleep on the bedroll next to it, and lighting the matchstick once triggers the A Warm Fire achievement. The matchstick also lights the way through the rest of the Dark Garden, which is why this camp is the player's first real lesson in the matchburn economy.
Camp Relocation After Each Boss
The campsite moves after each of the major Act 1 and Act 2 bosses, and the relocation is not optional. The designers use the camp as a waypoint that unlocks the next region, so backtracking to the previous camp and finding it empty is one of the first "wait, what?" moments for new players. The camp is always one region behind Glimmer, which means a clean run looks like a chain of camp activations: Dark Garden → Webdrench Inn → Drains → Gravedigger Ground, and so on.
This is also why the matchmaking of "where is Ilda right now" questions in the community tends to be answered with "she is wherever you left her, so just keep playing." The camp is not a static location; it is a pacing tool, and the player who tries to backtrack to every old camp before pushing forward usually gets a slow run for no benefit.
Looter the Scavenger and the Merchant Economy
Looter is Ilda's business partner, the kingdom's traveling merchant, and the only NPC with a real shop interface in Well Dweller. The two of them form a small caravan: Ilda cooks and camps, Looter sells trinkets, refills, and the few upgrades the player can buy with hard-earned coins, and they move together as a pair. If the camp is the soft heart of the game, Looter's stock is the soft wallet.
What Sells at Looter's Stall
Looter rotates stock every time Glimmer rests at a camp, which means the camp loop is also the shop loop. The shop sells healing refills, throwable items, a small set of permanent trinkets, and a couple of cosmetic items that the community has tied to flavor achievements. The First Purchase achievement pops the first time Glimmer buys anything from Looter's shop, which is one of the easiest Steam achievements to miss because some players try to save their coins for late game and never buy a single item from the early shop.
| Stock Type | Example Item | Approx. Coin Cost | Best Time to Buy |
|---|---|---|---|
| Healing refill | Soak vial (restores 1 spa charge) | 30–50 coins | Right before a boss |
| Throwable | Spark bomb | 80–120 coins | Mid-game boss setup |
| Trinket | Wanderer charm (small dash boost) | 150–200 coins | After the second boss |
| Camp item | Warm blanket (camp dialogue change) | 100 coins | Anytime |
Looter also accepts a small set of trade-in items for the harder trinkets, and the community has documented that his rotation includes at least one build-defining piece in every region. Because the rotation is genuinely random, the safest strategy is to buy what you can afford the moment it appears and not to assume the same trinket will reappear in a future camp. The full roster of trinkets and their slot costs is covered in the trinkets category, and pairing that guide with this one is the fastest way to plan a build around what Looter actually sells.
Looter vs Other Merchants
Looter is the only Well Dweller merchant with a permanent camp, but the kingdom has a handful of one-shot vendors and barter NPCs. Magda the dollmaker in the mid-band region trades crafted items for specific collectibles rather than coins, Egbert the spindly trader in the deep band trades for trinket shards, and the unnamed ghosts that flicker near boss doors accept only story pages in exchange for lore. The table below maps them out so you know which vendor to visit and what to bring.
| Merchant | Region | Currency Accepted | Best Trade |
|---|---|---|---|
| Looter | Follows Ilda's camp | Coins | Healing, throwables, trinkets |
| Magda | Dollmaker's House, mid-band | Story pages + doll parts | Crafted trinkets, cosmetic masks |
| Egbert | Deep band, near the Shrine | Trinket shards | Late-game trinket rerolls |
| Ghost vendor | Near the Silver Doll arena | Story pages | Lore entries, one passive charm |
The point of the merchant roster is that Looter is the only consistent coin sink, and the others are gated by collectible progress rather than money. If you want to plan a route that hits every vendor, the siblings and reunion guide is the most useful companion because it tracks which siblings show up in which region, and the siblings are the soft currency that Magda and Egbert respond to.
Ilda, the Siblings, and the Family Storyline
Ilda is not the only mouse in the kingdom. She is one of a larger litter of rodent siblings who were scattered when the Hunter came through, and rescuing her brothers and sisters is what drives the Flock and Reunion achievements. The siblings are the quiet backbone of the side content, and the camp is where Ilda processes each rescue in her own understated way.
The Sibling Roster
There are 20 siblings in total according to community walkthroughs, and they are split across the same regions the camp moves through. A few are named NPCs (Ilda, Egbert, Magda, Thimble, Thistle) and the rest are anonymous rodent-shaped spirits that need to be returned to a nest at a camp. The named siblings are usually found in story-locked rooms, the unnamed ones are scattered as random drops and hidden pickups, and the camp is the only place where the return animation actually plays out.
| Named Sibling | Region | How to Find | Camp Reaction |
|---|---|---|---|
| Ilda | Dark Garden (auto) | Free at the start | Lights the first fire |
| Egbert | Deep band, near the Shrine | Grappling puzzle in the ceiling | Quietly grateful |
| Magda | Dollmaker's House | Talk to her at the door | Trades pages for masks |
| Thimble | Webdrench Inn, hidden room | Knock down the loose brick | Plays a small drum |
| Thistle | Lookout Tower, top platform | Climb the Tower after the matchstick upgrade | Sings a short song |
The rest of the 20 are scattered in the various regions and they show up as small spirit pickups near regular enemies. Returning all 20 is what unlocks the Full Flock achievement, and the Reunion achievement triggers when the final nest is filled. The names on the side matter because Ilda will quietly comment on each sibling as they arrive at the camp, and her dialogue is the only in-game hint that you have actually completed the set.
The Camp After the Reunion
Once all 20 siblings are returned, the camp changes. Ilda opens a small shrine next to the fire, the nest glows, and a new dialogue option appears that ties into one of the alternate endings. Community testing has confirmed that this state of the camp is required for the Warm Hearth ending and is a soft prerequisite for the Burned the Queen ending, because the shrine is the only place where the player can light the matchstick one last time without combat pressure.
The shrine also changes Looter's stock, because the merchant reacts to the camp upgrade with a one-time restock that includes a charm the player cannot get anywhere else. Most players miss this because they finish the run while the shrine is still inactive, which is why the achievement roadmap in the collectible map guide is worth reading before you commit to a final act.
Achievement Routes That Run Through the Camp
Three Steam achievements are tied to the camp loop: A Warm Fire (camp with Ilda), First Purchase (buy from Looter), and the stitched-up flag that contributes to the Tattered Doll achievement. The first two are the easiest achievements in the game if you light the camp fire on the way out of the Dark Garden and buy anything from Looter the first time his shop opens. The third is missable if you do not return to the camp after the third boss.
| Achievement | Trigger | When to Get It | Missable? |
|---|---|---|---|
| A Warm Fire | Light the matchstick at Ilda's first camp | Within the first 30 minutes | No |
| First Purchase | Buy anything from Looter | First rest at any camp | No, but easy to delay |
| Solo Spirit | Return a single sibling to the nest | After the first sibling rescue | No |
| Tattered Doll (partial) | Stitch flag at the camp | After the third boss, before Act 3 | Yes, missable after Act 3 |
The stitched-up flag is the only one that requires intentional backtracking, because the camp is the only place the flag can be triggered, and the trigger only appears after the third boss. If a player skips the camp on the way to Act 3, the flag never pops and the Tattered Doll achievement chain stalls, which is why the littlest bird achievement guide lists the camp as a required stop.
Common Camp Mistakes
The fastest way to soft-lock an achievement run is to skip the camp because the next boss is "right there." The camp is always on the way to the next region, but players in a rush will jump the gap and miss the fire. The other common mistake is to assume the First Purchase achievement will trigger when Looter auto-sells an item — it does not; the player has to actively buy something for the first time. Finally, the camp's healing soak is free if Glimmer sits at the fire with a lit matchstick, so skipping the soak to save coins is a false economy. The camp is designed to be cheap, the merchants are designed to be visited, and the achievements are designed to pop during normal play, which is why the camp is the soft metronome of the entire run.
Frequently Asked Questions
Where do I find Ilda's first camp in Well Dweller?
Ilda's first camp is in the Dark Garden, just past the starting bonfire and to the left of the path that leads to the Groundskeeper. Walk west from the spawn, drop down the small ledge, and you will see the tent, the bedroll, and the matchstick-ready fire. Lighting the fire once is what triggers the A Warm Fire achievement, and resting at the camp is what unlocks Looter's first shop rotation.
Who is Looter and how does his shop work?
Looter is Ilda's traveling merchant partner, a scavenger who rotates stock every time Glimmer rests at a camp. He sells healing refills, throwables, trinkets, and small camp items in exchange for coins, and the First Purchase achievement pops the first time Glimmer buys anything. His stock is randomized, so the safe strategy is to buy what you can afford the moment it appears rather than waiting for a "better" rotation.
How do I unlock the Full Flock achievement and where do the siblings go?
There are 20 siblings scattered across every region, and they return to the nest at Ilda's camp once rescued. Named siblings like Egbert, Magda, Thimble, and Thistle are tied to specific story rooms, while the rest are random pickups. Returning all 20 unlocks the Full Flock achievement and changes the camp with a new shrine, which is also required for the Warm Hearth ending.
Is the A Warm Fire achievement missable?
No, A Warm Fire is not missable because the camp is impossible to miss in the first 30 minutes of any playthrough. Light the matchstick at the Dark Garden bonfire and the achievement pops instantly. The trick is to make sure Glimmer actually interacts with the fire, because just walking past the camp does not count as camping with Ilda.
What is the best thing to buy from Looter early on?
Buy the soak vial refill first because it lets Glimmer heal at the camp without burning matchstick charges. The wanderer charm is the second priority because the small dash boost compounds across the entire run. Save the spark bombs for boss setups rather than buying them in the early game, and only spend on cosmetic items after the build is stable.