
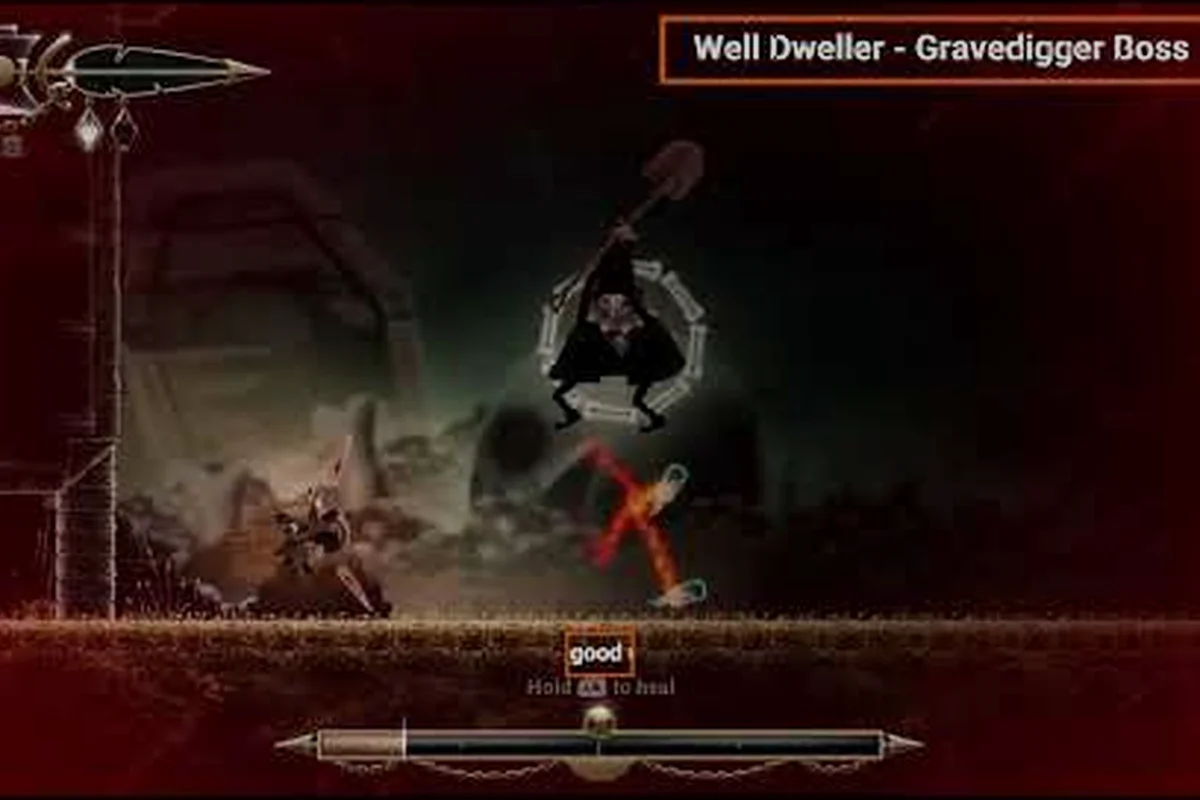
Learning how to beat Gravedigger in Well Dweller is the moment most players hit a wall, because the mid-game boss roster suddenly mixes multi-phase arenas, ranged add pressure, and traversal-gated entry conditions. This guide walks you through the Gravedigger pattern sheet, the Silver Doll mechanical puzzle, the Shrine of the Seven Sons minion-swap mechanics, the Forest King subversion, and the Swarm boss you may have skipped, all using data pulled from the official Well Dweller Steam page and the boss showcase video by Accelerated Ideas.
Gravedigger Boss Fight: Full Pattern Sheet and Loadout
The Gravedigger sits at the boundary between Act 2 and Act 3, and the achievement entry Dig Deep confirms it as a hard progression gate. The arena is a wide vertical pit with collapsible floor tiles, so positioning matters more than raw damage. Build for Heavy Strike damage and Matchburn sustain before the door opens, and you will shave several attempts off the run.
Pre-Fight Setup and Trinket Load
You want a loadout that blends high single-hit damage with safety windows. The most reliable Gravedigger build reported by early players stacks Boulder Bracer (extra knockback when your heavy attack lands), Sootward Ring (reduces incoming matchburn cost when you take a hit), and Glass Marbles (extra coin drops, which you can bank at Looter's shop for the final trinket slot). Skip any trinket that boosts aerial combos, because the Gravedigger rarely leaves the floor.
| Trinket Slot | Recommended Pick | Why It Works |
|---|---|---|
| Slot 1 | Boulder Bracer | Adds knockback to Heavy Strike, buying space after each punish |
| Slot 2 | Sootward Ring | Recovers matchburn when hit, keeping your ranged option live |
| Slot 3 | Glass Marbles | Generates extra coin for late-game shop upgrades |
| Slot 4 | Ember Charm | Passive +5% fire damage to all thrown vessels |
Heal to full at the Spa before entering, and make sure you have at least 400 coins banked with Looter in case you need a respawn-buffer upgrade.
Attack Pattern Cheat Sheet
The Gravedigger cycles through four named moves, and the safe punish window is short but consistent. According to the all-boss showcase from Accelerated Ideas, the move order is roughly scripted, so once you survive two full loops the rest of the fight is muscle memory.
| Phase | Move Name | Tell | Punish Window |
|---|---|---|---|
| Phase 1 (100-66% HP) | Shovel Slam | Raises shovel overhead for 0.8s | 2 Heavy Strikes after recovery |
| Phase 1 | Coin Toss | Pulls a coin pouch from belt | Throw a fire vessel to interrupt |
| Phase 2 (66-33% HP) | Tomb Toss | Lobs three tombstone projectiles in an arc | Dodge back, then 1 Heavy Strike |
| Phase 2 | Earthquake Stomp | Jumps and lands center arena | Free 3-hit combo once dust clears |
| Phase 3 (33-0% HP) | Enraged Slam Combo | Three consecutive shovel swings | Dodge through the middle swing, punish the third |
The two cleanest tells are the Shovel Slam windup and the Earthquake Stomp jump, because both leave Gravedigger locked in animation for a full second. Save your Fire Vessel for the Phase 2 Coin Toss, because interrupting it prevents the tombstone shower that follows.
Mid-Fight Adaptations
When the floor tiles start breaking in Phase 2, your safe zone shrinks to roughly 40% of the original arena. Stay near the back-left pillar, and never chase the boss across a cracked tile. The Heavy Strike → back-dodge loop is safer than trying to squeeze in a third swing. If your matchburn gauge drops below 30%, switch to Light Attack chains until you regen, because a thrown vessel with low matchburn deals almost no damage and just alerts the boss to your position.
Silver Doll Boss Strategy and Reward Unlock
The Silver Doll is the puzzle boss of Act 3, and players looking for the Sharp and Shiny achievement need to learn the rotation rather than the dodge timing. Unlike the Gravedigger, the Silver Doll is invulnerable to direct damage until you complete the Mirror Phase, where the boss copies your last three inputs in reverse. According to the Well Dweller achievement stats on Steam, Sharp and Shiny has one of the lowest unlock rates among the Act 3 fights, mostly because players try to brute-force the rotation instead of learning it.
Mirror Phase Inputs
The Silver Doll mirrors your inputs with a 0.4-second delay. The trick is to bait the reverse pattern by performing a Heavy Strike → Light Attack → Dodge sequence, then dodge three times in a row. The Doll will copy the pattern in reverse: three dodges, then light, then heavy. Once you complete the mirrored sequence, the Doll becomes vulnerable for 4 seconds, which is enough for one full Heavy Strike combo and a throwable vessel.
| Your Input | Doll Mirrors | Result |
|---|---|---|
| Heavy → Light → Dodge | Dodge → Light → Heavy | Vulnerability window opens |
| Two Light Attacks in a row | Two Light Attacks back | Stagger only, no vulnerability |
| Dodge away and stop | Doll stops and resets | Safe recovery, no progress |
The single biggest mistake reported by players is over-inputting during the mirror phase. You only need three correct inputs, and a fourth input breaks the chain. Practice the rotation on the training dummies near the Workshop before you commit to the arena, because the Silver Doll fight resets the rotation every time you take a hit.
Reward and What Unlocks Next
Defeating the Silver Doll drops the Silver Key, which opens the locked door behind the Dollmaker's House and grants access to a hidden Story Page that ties into the Burned the Queen ending. The key is also a prerequisite for the Expert Collector achievement chain, because it counts as one of the required NPC-bond milestones. The same boss showcase video confirms that the Doll's arena has a hidden ceiling hatch that opens only after the boss dies, leading to a trinket chest containing the Mirror Shard charm.
Shrine of the Seven Sons Boss Mechanics
The Shrine of the Seven Sons is the most mechanic-heavy fight in Act 2, because the boss spawns a Son minion every 25% HP, and each Son grants a different buff to the arena. The achievement Stormy Night confirms this as a required story beat, and the Well Dweller boss list breakdown places the Shrine right after the Lady of the Drains and before the Starsinger. The fight rewards players who manage add priority over boss damage.
The Seven Sons and Their Effects
Each Son has a unique aura that buffs the Shrine boss while alive. The order is semi-random, but the arena always spawns them from the left pedestal first, then right, then center. You have a 10-second window after a Son appears to kill it before the buff locks in, and the buff persists for the rest of the phase.
| Son | Aura Effect | Counter |
|---|---|---|
| First Son (Left) | Boss gains a fire shield | Throw two fire vessels to pop the shield |
| Second Son (Right) | Arena fills with poison gas | Move to the back platform, use heavy strikes only |
| Third Son (Center) | Boss heals 1% HP per second | Stun with a thrown vessel, then Heavy Strike chain |
| Fourth Son (Random) | Boss enrages at 50% HP instead of 25% | Save your burst damage for Phase 2 |
| Fifth+ Sons | Combo of the above three | Cycle the previous counters |
According to community data, the Third Son is the most missed kill, because its heal aura stacks with the boss's natural Phase 2 regen, and many players don't realize the boss is healing until their damage suddenly plateaus. The counter is simple: as soon as the center pedestal lights up, throw a fire vessel at the Son before it finishes channeling, then land a Heavy Strike chain during the stun.
Trinket Swaps for This Fight
Drop the Boulder Bracer for the Storm Cloak trinket before this fight, because the poison gas aura deals percentage-based damage and the cloak gives 15% damage resistance for the first 10 seconds of each phase. Keep Sootward Ring in the second slot, because you'll be taking chip damage from the gas and the matchburn refund keeps your throwable vessels loaded.
Swarm Boss and the Forest King Subversion
The Swarm is technically a mini-boss, but it gates the Lady of the Drains path and drops a required traversal upgrade. The Forest King is the opposite: a story boss that you win over rather than kill, as confirmed by the Fancy Feast achievement wording on the Steam Community stats page. Both fights break the standard damage-trading pattern, and most players underestimate them.
Beating the Swarm Without Losing Health
The Swarm is a wave-based encounter with three rings of bugs, and the arena is a circular platform with breakable outer edges. The trick is to never stand still, because the bugs deal contact damage and respawn within 0.5 seconds of dying. Use your Grappling Hook to swing between the center pillar and the outer ring, and only land a Heavy Strike when the bugs are clustered. Each ring takes roughly 90 seconds to clear, and the fight ends when you defeat the Swarm Queen in the third ring.
| Ring | Bug Count | Recommended Approach |
|---|---|---|
| Ring 1 (Outer) | 12 small bugs | Grappling swing + Light Attack chains |
| Ring 2 (Middle) | 8 medium bugs | Heavy Strike into the center, then back-dodge |
| Ring 3 (Inner) | 1 Swarm Queen | Save all fire vessels for the Queen, ignore the adds |
The Queen has a 3-hit combo followed by a charge, and the punish window after the charge is wide enough for two Heavy Strikes and a throwable vessel. According to player reports on community threads, the Glass Marbles trinket is the MVP here, because the extra coin drops let you bank enough for the Looter's final upgrade before the Forest King fight.
Forest King: How to Win Without Fighting
The Forest King is the most unique encounter in the game, because the Fancy Feast achievement wording implies you need to win the beast over, not kill it. The fight has three stages: bait, feed, and bond. During the bait stage, you need to throw three specific berries into the arena, which spawns from the Hunter's Keep bushes. During the feed stage, the Forest King eats the berries and falls asleep, and you have a 30-second window to place a glowing lantern near its head. During the bond stage, the Forest King wakes up and follows you to the Hunter's Keep entrance, where it becomes a permanent NPC.
| Stage | Action | Reward |
|---|---|---|
| Bait | Throw 3 Hunter's Keep berries into the arena | Forest King stops aggro |
| Feed | Place a glowing lantern near the sleeping beast | Trinket: Beast Bell |
| Bond | Lead the Forest King to Hunter's Keep entrance | Achievement: Fancy Feast |
The most common missable here is forgetting to pick up the berries from the Hunter's Keep before entering the arena. The berries respawn every 20 minutes in-game, so you can always come back, but you cannot progress the Forest King chain without them. The Beast Bell trinket is a permanent summon that scares off weaker enemies, making it one of the best traversal utilities in the late game.
Late-Game Trinket Synergies and Prep for the Queen
Once you've cleared the Gravedigger, Silver Doll, Shrine of the Seven Sons, Swarm, and Forest King, the only boss left is the Queen in the final act. The preparation phase matters more than the fight itself, and your trinket loadout should reflect the Burned the Queen ending requirements if you want the best outcome. The Well Dweller Workshop location guide covers the best farming spot for the Ember Charm and Beast Bell, both of which are key for the final fight.
Final Loadout and Pre-Fight Checklist
Before you enter the Queen's antechamber, you need all 32 trinket slots unlocked, which costs roughly 8,000 coins at Looter's shop. The Groundskeeper boss guide covers the coin farming route, but the short version is: clear the Dark Garden adds twice, sell the drops, and repeat until you hit the cap.
| Prep Step | Requirement | Why |
|---|---|---|
| Unlock all 32 trinket slots | 8,000 coins total | Required for the full build |
| Stock 3 fire vessels | Free from the Workshop | Interrupt the Queen's Phase 1 spell |
| Bond the Forest King | Complete the Fancy Feast chain | Unlocks the Beast Bell summon |
| Collect all 20 Story Pages | Hidden across all regions | Required for the Burned the Queen ending |
| Upgrade the Matchstick | Spend 1,500 coins at Looter | Doubles fire vessel damage |
According to the Well Dweller on Steam page, the base game has 41 achievements and 32 collectible trinkets, so the loadout ceiling is well-defined. The final Queen fight has three phases, and the Beast Bell summon is the cleanest Phase 2 interrupt, because it stuns the Queen for a full 4 seconds, which is enough to land a full Heavy Strike combo plus a fire vessel.
Frequently Asked Questions
What is the easiest way to beat Gravedigger in Well Dweller?
Stack the Boulder Bracer and Sootward Ring trinkets, bait the Shovel Slam tell, and punish with two Heavy Strikes per cycle. Phase 2 is the wall, so save your fire vessel for the Coin Toss interrupt and stay near the back-left pillar when the floor tiles start breaking.
How do I unlock the Silver Doll vulnerability window?
The Silver Doll mirrors your last three inputs in reverse during the Mirror Phase. Perform a Heavy Strike → Light Attack → Dodge sequence, then input three dodges. The Doll copies the pattern in reverse, and completing the mirrored sequence opens a 4-second vulnerability window. A fourth input breaks the chain.
Which Son should I kill first in the Shrine of the Seven Sons fight?
Always kill the Third Son (center) first, because its heal aura stacks with the boss's natural Phase 2 regen. Throw a fire vessel to stun the Son, then land a Heavy Strike chain during the stun. The other Sons can be cleared in any order, but the center Son's aura is the most punishing if left alive.
Can I skip the Forest King fight and still get the best ending?
No, the Fancy Feast achievement requires you to bond the Forest King, and the Beast Bell trinket is locked behind the bond chain. The Forest King also becomes a permanent NPC at the Hunter's Keep, which unlocks a shop upgrade that is required for the 32-slot trinket cap.
What trinkets should I bring to the Queen fight?
Bring the Beast Bell, Boulder Bracer, Sootward Ring, and Ember Charm. The Beast Bell stuns the Queen in Phase 2, the Boulder Bracer adds knockback to your Heavy Strike punish, the Sootward Ring refunds matchburn on chip damage, and the Ember Charm boosts fire vessel damage for the Phase 1 spell interrupt.